
No products in the Trolley.


Category Archives: Articles & News
Essex TP Chandler Materials: Proud Stockists of Anglia Lime Products
At Essex TP Chandler Materials, we take pride in supplying high-quality building materials that meet the needs of both modern and traditional construction projects. That’s why we’re delighted to be a proud stockist of Anglia Lime products—offering a wide range of lime-based solutions ideal for restoration, conservation, and sustainable building practices.
Who are Anglia Lime?
Anglia Lime is a leading specialist in lime-based building materials, supplying a comprehensive selection of lime mortars, plasters, renders, and paints. With years of expertise, they provide high-quality, traditional building materials designed to enhance and preserve historic structures while also being an excellent choice for environmentally conscious new builds.
Why use Lime in Restoration Work?
Lime-based products have been used for centuries in construction and remain an essential material for the restoration and conservation of historic buildings. Unlike modern cement-based products, lime offers breathability and flexibility, making it the perfect choice for older buildings.
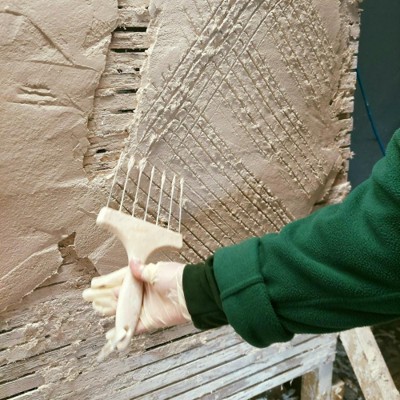
Here are some of the key benefits:
- Breathability – Lime allows moisture to pass through, preventing trapped moisture that can cause damp and structural damage.
- Flexibility – Unlike rigid cement, lime mortar accommodates the natural movement of a building, reducing the risk of cracking.
- Eco–Friendly – Lime absorbs CO2 during its curing process, making it a more sustainable option compared to cement.
- Aesthetic Compatibility – Lime blends seamlessly with existing historic materials, ensuring a more authentic restoration.
Essex TP Chandler Materials: Your Go-To Supplier for Anglia Lime Products
As a trusted supplier, we offer a wide selection of Anglia Lime products available for collection or delivery. Whether you’re a contractor working on a heritage restoration project or a homeowner looking to use traditional materials for your property, our team is here to help with expert advice and product recommendations.
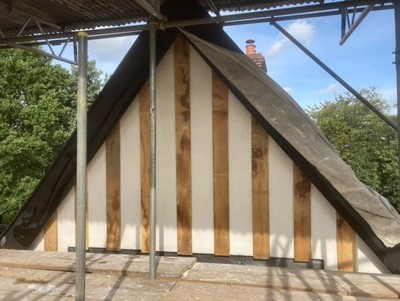
Visit us in-store or get in touch to learn more about how Anglia Lime products can support your next project. At Chandler Materials, we’re committed to providing quality materials that preserve the past while building for the future.
We look at the latest bathroom trends for 2026 for the UK
What’s Next for Design, Materials and Everyday Luxury
As we move into 2026, bathroom design continues to evolve beyond purely functional spaces and further into considered, design-led environments that balance style, wellbeing and practicality. Feedback from leading bathroom manufacturers and industry voices points to a clear direction of travel: bathrooms that feel calmer, more personalised and built to last, without sacrificing visual impact. A relaxing retreat away from the hectic busy world we now live in.
Below, we explore the key bathroom trends predicted for 2026, alongside how recently launched ranges from Roper Rhodes, Lakes Showering and Multi-panel are shaping the future of bathroom design.
Calm, Natural and Softly Layered Interiors
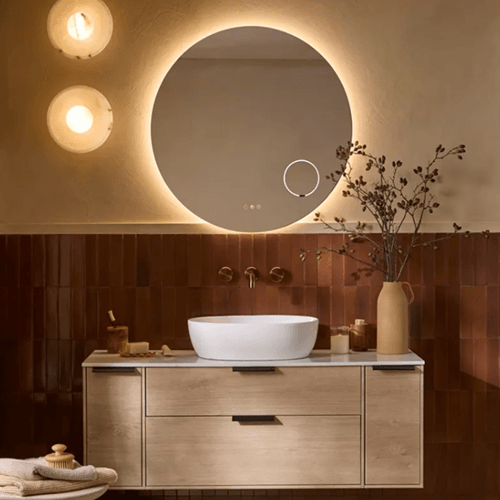
Nature-inspired design remains influential, but 2026 sees a softer, more refined interpretation. Expect muted colour palettes, warm neutrals, subtle stone tones and gentle textures that create a spa-like atmosphere at home. Bathrooms are becoming spaces to unwind rather than statement rooms that overwhelm.
Elevated Storage with a Furniture-Led Feel
Bathroom furniture continues to move away from purely practical units and towards furniture that wouldn’t look out of place elsewhere in the home. Floating vanities, modular layouts and concealed storage are expected to dominate in 2026, helping create uncluttered, open-feeling spaces.
Recent Roper Rhodes ranges have leaned into this trend, offering flexible configurations and clever internal storage without compromising on design. The focus is on clean lines, quality craftsmanship and adaptable layouts that suit both compact ensuites and larger family bathrooms, often featuring niche storage solutions.
Showers as the Centrepiece
Showers are increasingly becoming the focal point of bathroom design, especially as homeowners prioritise daily comfort and ease of use with modern fixtures. Walk-in showers, minimal framing and seamless glass are set to remain key features through 2026, often complemented by earthy tile choices.
Lakes Showering’s latest collections highlight this evolution. Their newer ranges showcase refined profiles, enhanced glass coatings and elegant hardware finishes that elevate the shower space without making it feel intrusive. There is also a clear emphasis on accessibility, durability and easy maintenance, aligning with the growing demand for bathrooms that work well for all life stages, including freestanding fixtures.
Seamless Surfaces and Low-Maintenance Materials
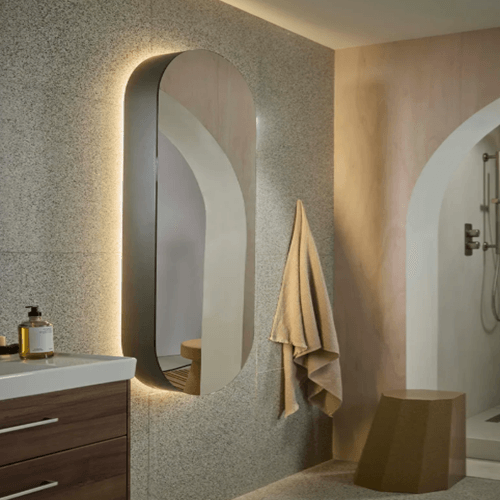
Practicality is playing a bigger role in design decisions, particularly when it comes to wall finishes. Large-format wall panels, grout-free installations and hygienic surfaces made from natural materials are expected to grow further in popularity throughout 2026.
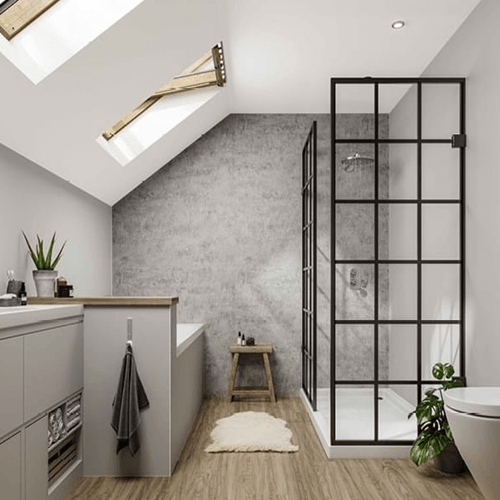
Multi-panel’s newest launches demonstrate why this category continues to expand. Their recent ranges introduce more realistic stone, concrete and textured finishes, allowing homeowners to achieve high-end looks with far less maintenance. The ability to create seamless walls around baths and showers without compromising on aesthetics is a major driver behind this trend, especially with the use of marble tiles.
Start Your Bathroom Renovation Project
The bathroom trends of 2026 are less about dramatic reinvention and more about refinement, with an emphasis on earthy tones and natural materials. Calm interiors, smarter storage, beautifully designed showers and practical, low-maintenance materials are all set to define the year ahead.

If you’re feeling inspired by the bathroom trends set to shape 2026, now is the perfect time to start planning your own modern bathroom space. Visit our showroom to explore the latest ranges from leading bathroom brands and see materials, finishes and layouts up close. Our experienced team is on hand to offer advice and create a tailored design to suit your home and lifestyle. Book an appointment today and take the first step towards designing the bathroom you’ve always imagined.
How to Install Cedral Weatherboarding
Composite cladding has become one of the biggest trends in modern home design, offering a contemporary, low-maintenance alternative to traditional timber. Among the leading choices, Cedral weatherboarding stands out for its durability, style, and ease of installation — making it a favourite for homeowners and builders alike. At Chandler Materials, we stock a wide range of Cedral and other composite cladding options, helping you achieve the perfect finish for any project.
Cedral cladding is made from fibre cement, giving you the authentic look of painted timber without the hassle of constant upkeep. It won’t rot, warp, or crack, and is available in two styles — Cedral Lap, for a traditional overlapping appearance, and Cedral Click, which uses an interlocking tongue and groove system for a sleek, modern look. Both are available in a variety of colours and finishes to complement any property.
Installing Cedral cladding is relatively simple if you follow a careful approach. Here’s a step-by-step guide with some useful tips:
Installation Steps:
Prepare the wall: Ensure the surface is clean, dry, and even. Attach a breathable membrane to protect against moisture while allowing ventilation.
Install battens: Fix vertical treated timber or metal battens evenly spaced and level. Tip: Check the first batten alignment carefully — any unevenness will affect the whole installation.
Fit the starter profile: Attach a starter profile at the base of the wall to guide your first board. Make sure it is perfectly level.
Install the boards:
For Cedral Lap, overlap each board by the recommended amount and fix through the top edge into the battens.
For Cedral Click, slot each board into the next using the tongue and groove system, securing with screws or clips as specified. Tip: Use stainless steel or coated screws to prevent corrosion and avoid overtightening.

Trim corners and openings:
– Use corner trims, window surrounds, and end profiles for a neat, professional finish.
– Cut boards with a fine-toothed saw or fibre cement blade, and wear a dust mask for safety.
Final checks: Wipe down the surface, ensure all boards are level, and confirm that all fixings are secure.
Composite cladding like Cedral continues to grow in popularity thanks to its smart, sustainable, and long-lasting design. If you’re planning to upgrade your home’s exterior, visit Chandler Materials to explore our full range of Cedral weatherboarding and other composite cladding options, available for collection or delivery. Our team is always on hand to offer advice and help you find the perfect materials for your next project.
Transform your exterior with Cedral weatherboarding from Chandler Materials — the modern way to achieve timeless style.
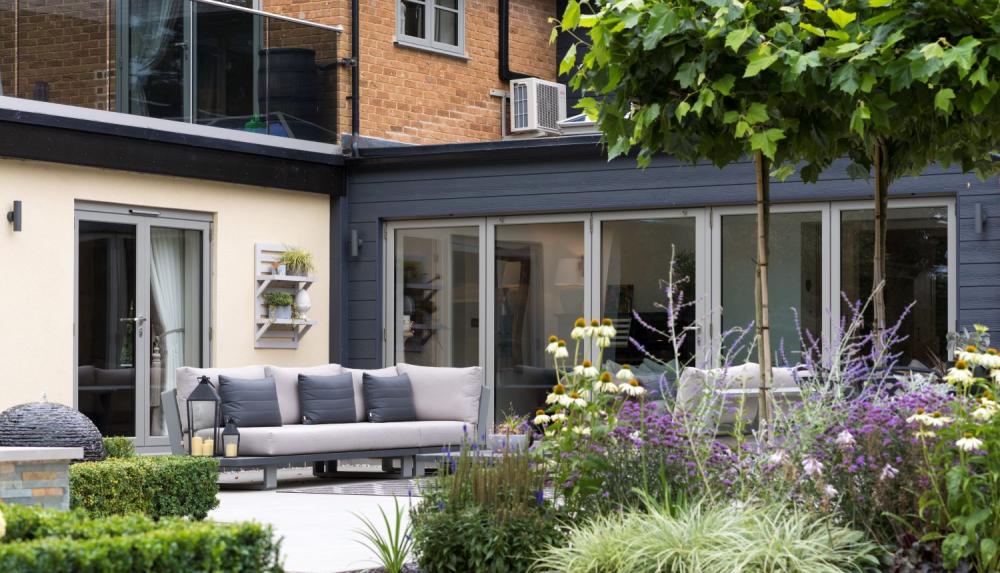
If you’re looking to enhance your home’s kerb appeal or give a building project a fresh, modern finish, weatherboarding and cladding are versatile and stylish solutions that also offer long-lasting protection from the elements. At Chandler Materials, we stock a wide range of cladding options, including the renowned Cedral range – perfect for both contemporary and traditional designs.
Why Choose Cladding or Weatherboarding?
Cladding serves as a protective outer layer for your building, shielding it from wind, rain, and other environmental factors. But beyond its functional benefits, cladding also gives you the opportunity to completely transform the appearance of a property. Whether you’re working on a new build, a renovation, or simply updating a tired exterior, weatherboarding can deliver a sleek and durable result that stands the test of time.
Discover Cedral – A Name You Can Trust
At Chandler Materials, we’re proud to stock Cedral fibre cement cladding, known for its premium quality, low maintenance, and stunning finish. Cedral is designed to replicate the natural look of timber, but without the upkeep issues that come with traditional wood cladding. It won’t rot, warp or fade, making it an excellent choice for UK homes.
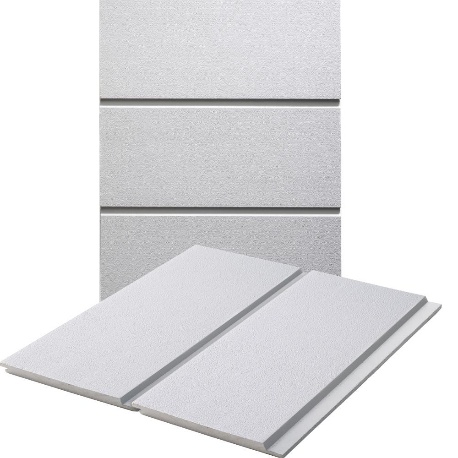
Cedral Lap
You can choose from Cedral Click for a modern flush finish or Cedral Lap for a more classic overlapped look. The boards can be fitted both horizontally and vertically, depending on the style you’re going for – offering complete flexibility whether you’re cladding a whole house or creating an accent wall.
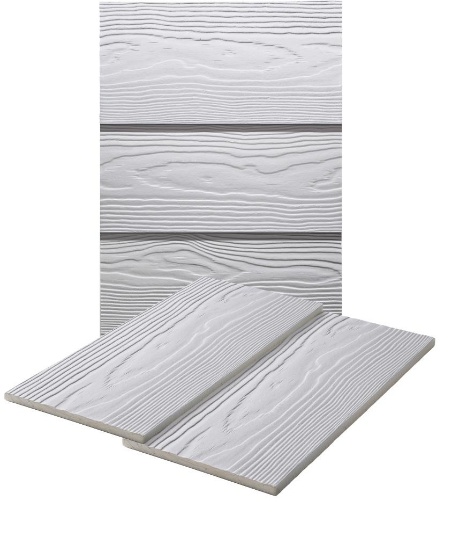
Cedral Click
A Wide Range of Colours and Styles
Cedral comes in an extensive palette of colours, from subtle neutrals and coastal tones to bold, contemporary shades. Whether you want to make a statement or blend into the natural surroundings, there’s a colour and texture to suit every project.
Visit us at Chandler Materials to explore the full colour range in person – and our experienced team will be happy to advise on the best style and finish for your job.
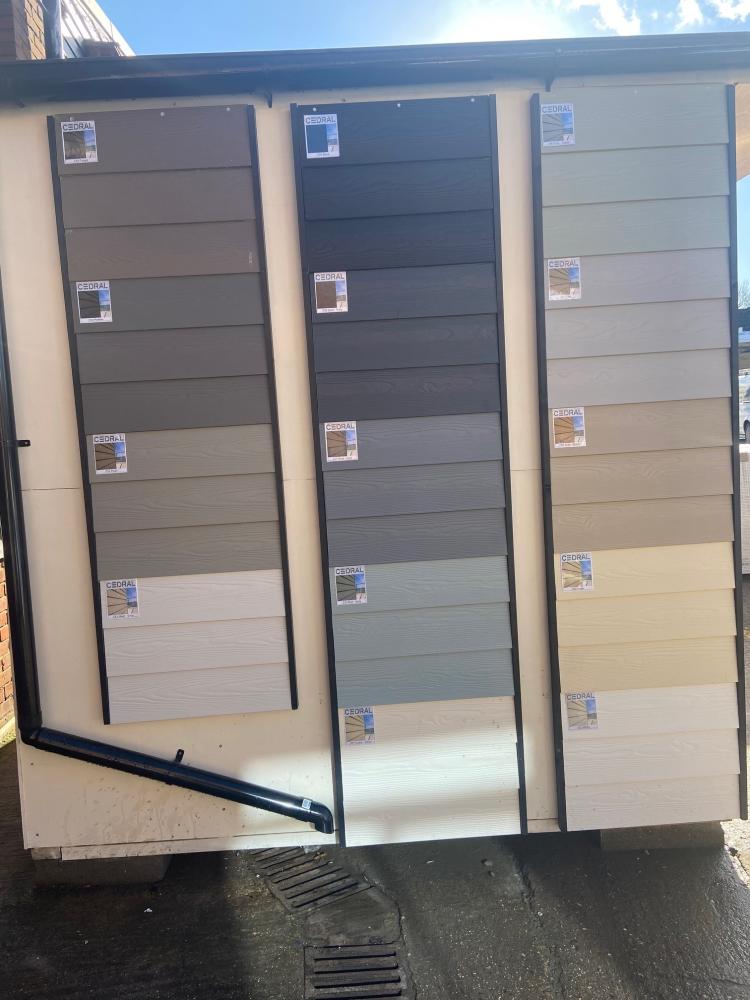
In Stock and Ready to Go
We keep a wide selection of Cedral weatherboarding and accessories in stock at Chandler Materials, with options for delivery or collection to keep your project moving on schedule. Whether you’re a tradesperson or a homeowner looking to DIY, we can help source everything you need to get the job done!
How to Plan Your Garden: A Step-by-Step Guide to Your Outdoor Space
Whether you’re starting with a blank canvas or refreshing a tired outdoor space, knowing how to plan your garden properly is the difference between a space you love and one that frustrates you every summer. This step-by-step guide walks you through everything, from getting your ideas down on paper to choosing the right hard landscaping materials to bring it all together.
Grab a sheet of paper (graph paper if you have it, regular A4 will do), a measuring tape, and let’s get started.
First Steps: Assess What You’ve Got
Before you decide how to use your garden space, spend time understanding it as it is right now. A good garden plan is built on knowing what you’re working with, not just what you want it to look like.
Walk around it at different times of day and take note of:
- How much sunlight each area gets. Does it get full sun, partial shade, or deep shade? Different areas of the same garden can vary dramatically.
- Drainage. Where does water pool after rain? Are there slopes that funnel water toward the house or a seating area?
- What’s already there. Established trees, existing paths, or structures you want to keep will all shape your design.
- Access. How will materials and equipment get in during the build? This matters more than people expect.
Understanding these basics will save you a lot of grief later when you’re making decisions about surfaces, levels, and layout.
Put Your Plans on Paper
The next step is to sketch your garden to scale. You don’t need to be an architect; just pace out or measure the boundaries and note them down. Mark on your sketch:
- The position of the house and any doors or windows that look out onto the garden layout are crucial for creating a cohesive space.
- Existing features (trees, fences, sheds, paths)
- North-facing direction, so you can work out where sunlight falls throughout the day
- Any slopes or changes in level
Now you can start mapping out different zones. Think about how you want to use the space:
- Closer to the house: a patio, seating area, or composite decking works well here, keeping entertaining spaces accessible and easy to flow to from indoors
- Middle sections: lawn, raised beds, borders, or a kitchen garden
- Further from the house: a more relaxed planting scheme, a pergola or trellis for structure and greenery, or storage and utility space
Thinking in zones like this helps you arrive at a cohesive look rather than a collection of unrelated ideas. It also makes it much easier to work out your paving and surface requirements early, so you can budget and order materials before the season gets busy.
Things to Consider Before You Start Buying Materials
Getting the planning right before you order anything will save you time, money, and plenty of frustration on site. Here are the key things to work through:
Levels and Ground Preparation
If your garden slopes, you’ll need to decide early whether you’re cutting into the slope, building up with raised sections, or a mix of both. Garden sleepers are a practical and good-looking solution for retaining terraced levels or creating raised beds. Sort your levels before you finalise any surface choices.
Drainage
Hard surfaces need somewhere for water to go. If you’re laying a large paved area, you’ll need to think about falls, drainage channels, or permeable options. Getting this wrong is one of the most common and costly mistakes in garden landscaping.
How You’ll Actually Use the Space
A garden that looks great in a design sketch but doesn’t suit how you live in it will always feel like it’s missing something. Be honest about whether you need:
- Space for outdoor dining and entertaining
- A low-maintenance surface that’s easy to keep clean is essential in any garden layout.
- Room for kids or pets to run around
- Separate zones for relaxing, gardening, and storage
Access for Materials and Trades
Think practically about how materials will get to site. Paving slabs, Decking boards can be integrated into your garden design for a seamless transition between indoor and outdoor spaces., and sleepers are heavy and bulky. If access is tight, this can affect what’s feasible and how long the job takes.
Landscape Design: Choosing Your Hard Landscaping
The hard landscaping elements are the foundation of any garden project. Get these right and everything else, including planting and furniture, falls into place around them.
Paving
Paving defines the feel of the whole space in your garden design more than almost anything else. A contemporary large-format porcelain patio reads very differently to a traditional textured stone path. When choosing, think about how you plan a garden that suits your lifestyle and preferences.
- The style of your house. Modern properties suit clean, large-format slabs. Older or period homes often suit more natural, textured finishes.
- Colour and tone. Will it complement or contrast with your walls, fencing, and other materials?
- Practicality. Some surfaces need more maintenance than others. Smooth porcelain can be slippery when wet; textured slabs hide dirt better.
You can browse our full paving range at Essex TP Chandlers, including Bradstone ranges available to view in person or on our landscaping displays at our Southend or Chelmsford branches.
Decking: Softwood vs Composite
Decking is a great option for creating level outdoor living space, especially on sloped plots or where you want to raise a seating area. The main decision is material:
- Softwood decking is affordable and looks great when new, but requires regular treating to prevent rot and splitting over time.
- Composite decking costs more upfront but is genuinely low maintenance and resistant to rot, fading, and insect damage. Brands like NewTechWood give you the look of natural timber without the ongoing upkeep, making it a strong choice for busy households.
Garden Sleepers
Sleepers are one of the most versatile landscaping materials available. Use them to retain terraced levels on a sloped garden, build raised beds, edge a path, or add structure to a border. Essex TP Chandlers stock a range of garden sleepers suited to both functional and decorative applications.
Pergolas and Trellis
If you want to add height, shade, or a sense of enclosure to part of your garden, a pergola or trellis is worth planning in from the start rather than bolting on later. A pergola over a seating area creates a defined outdoor room. A trellis along a fence line can soften a boundary and add structure without taking up much ground space.
A Quick Checklist Before You Start Buying
Before you head to the merchant, run through these:
- Have you sketched your garden to scale and noted sun, shade, and drainage?
- Have you decided on your zones: entertaining, lawn, planting, storage?
- Have you sorted your levels and ground preparation plan?
- Have you settled on a paving or decking style that suits the house and your maintenance appetite?
- Do you know whether you need sleepers, a pergola, trellis, or other structural elements?
- Have you accounted for site access for materials and trades?
Getting all of this clear before you start spending makes the whole project run more smoothly and means far less second-guessing once work begins.
See Materials In Person Before You Decide
Colours, textures, and finishes all look different in person to how they appear on a screen or in a brochure. We have landscaping displays at our Southend and Chelmsford branches where you can compare options side by side and talk to our team about what will work for your project.
Our full landscaping and fencing range covers paving, decking, sleepers, and more: everything you need to turn your plan into a finished garden.
Good planning is what separates a garden that works from one that’s a constant source of frustration. Take the time to get it right on paper first and the build will be far more straightforward.
There’s something quietly transformative about stepping into a garden that feels considered, structured, and inviting. Not overdesigned, not overly polished—but balanced. A space where materials, textures, and features work together to create somewhere you actually want to spend time.
Fencing, arbours, pergolas, and trellis often sit in the background of garden design conversations, yet they’re some of the most powerful elements when it comes to reshaping an outdoor space. With the right choices, they can completely redefine how your garden looks, feels, and functions.
Framing Your Space with Purpose
Fencing is no longer just about boundaries. It’s about framing your garden—creating a backdrop that enhances everything in front of it. Whether you lean towards a clean, contemporary look or something softer and more traditional, the style of fencing you choose sets the tone for the entire space.
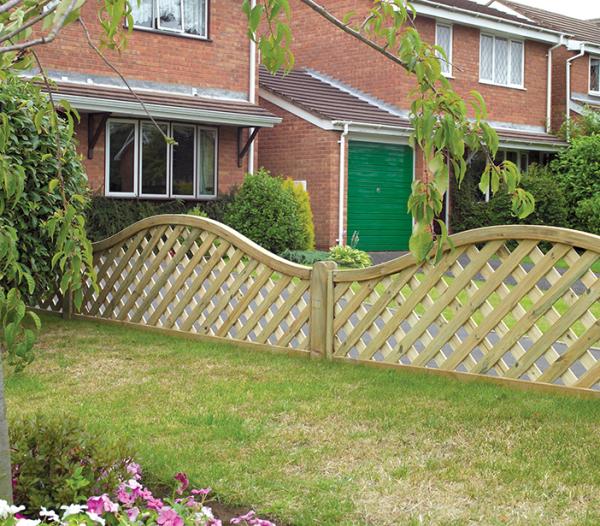
The beauty of the Grange range is the variety. From decorative panels that add visual interest to more solid designs that offer privacy and structure, there’s flexibility to match your vision rather than forcing you into a one-size-fits-all solution. It’s these details that turn a garden from functional into thoughtfully designed.
Creating Moments with Arbours and Pergolas
If fencing defines the edges, arbours and pergolas create the moments within.
An arbour can transform a simple pathway into something far more inviting—an entrance, a feature, a place that draws you through the garden. Pergolas, on the other hand, introduce height and presence. They create zones, whether that’s a shaded seating area, a dining spot, or simply a focal point that adds architectural interest.
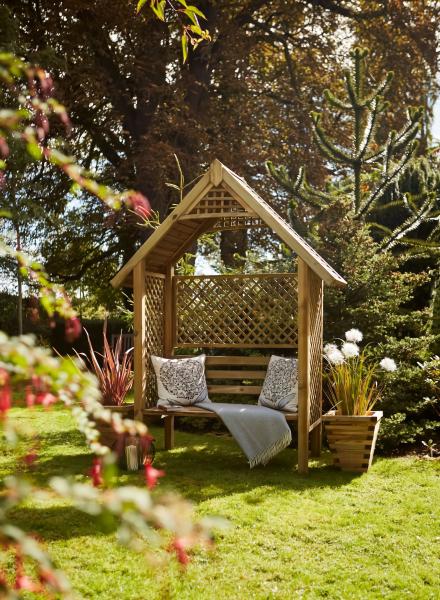
Climbing plants, soft lighting, or even left natural, these structures evolve with your garden over time. They don’t just sit in the space—they become part of how you experience it.
Trellis: The Subtle Game-Changer
Trellis is often overlooked, but it’s one of the most versatile elements you can introduce. It softens hard lines, adds texture, and gives planting a vertical dimension that can make even smaller gardens feel more layered and considered.
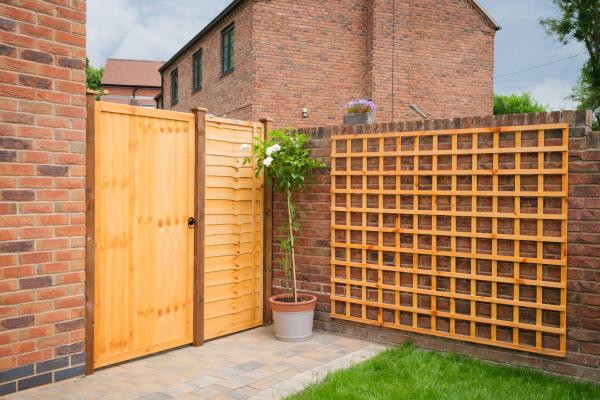
Used above fencing, as standalone panels, or integrated into features, trellis helps blur the line between built structure and planting. It’s a simple addition, but one that can completely change the feel of a space.
Making It Happen
These kinds of upgrades are often overlooked when planning a garden refresh, but they’re some of the most impactful changes you can make.
At Chandler Materials, we can supply and source a wide range of Grange fencing, arbours, pergolas, and trellis options to suit different styles and layouts. While we hold a selection of products on the ground, you can also explore these features within our landscaping displays—helping you visualise how they might work in your own space.

And if you’re after something specific, there’s a much wider range available to order. It’s not always the first thing people think of when visiting a builders merchant, but it’s an area where we can offer far more than expected.
Find Your Inspiration
If you’re planning a garden refresh, there’s no substitute for seeing these features up close.
Visit our landscaping displays at our Chelmsford & Southend branches to explore different styles, layouts, and combinations in person. It’s the perfect way to gather ideas, compare options, and start shaping a space that works for you.
Let the Light In This Summer with Velux Windows
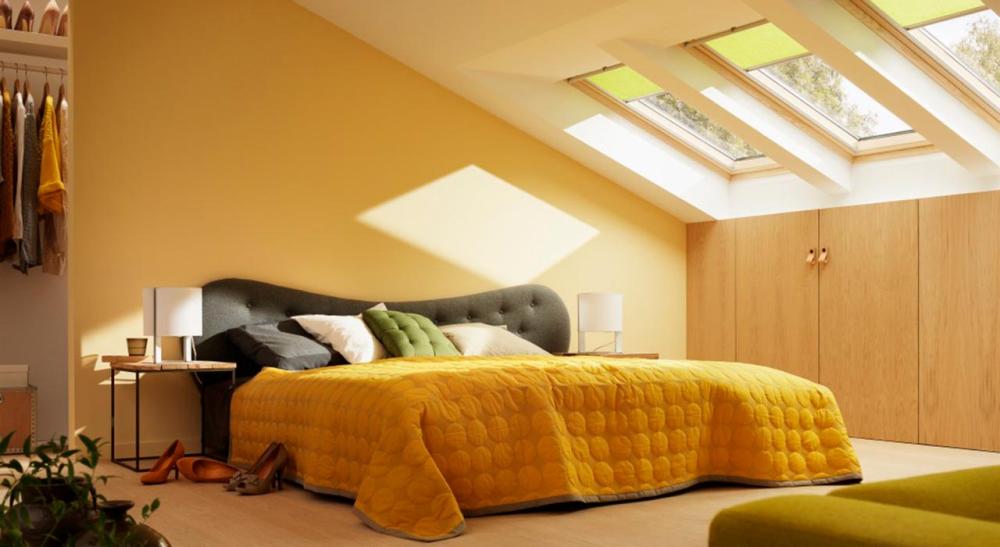
As summer approaches and the days grow longer, now is the perfect time to maximise natural light in your building projects. One of the best ways to do this? Velux windows – the gold standard in roof window design.
At Chandler Materials, we stock a wide range of Velux Manual White Maintenance-Free Roof Windows, and we can source any Velux product you need to suit your exact specification. Whether you’re working on a loft conversion, extension, or new build, Velux windows offer a practical and stylish way to bring more daylight and fresh air into your spaces.
Why Choose Velux?
Velux windows are designed to do more than just let light in – they transform living spaces. Here’s why so many of our trade and self-build customers choose Velux:
Increased natural light: Make the most of the longer summer days. Velux roof windows flood interiors with daylight, creating brighter, more welcoming environments.
Better ventilation: Keep cool as temperatures rise. Velux’s intuitive design makes it easy to control airflow and maintain a comfortable indoor climate.
Thermal efficiency: Built to the highest standards, Velux windows help keep energy costs down by reducing the need for artificial lighting and cooling.
Sleek, modern appearance: Whether you’re building contemporary or traditional, Velux has a style to suit every aesthetic.
Everything You Need, All in One Place
At Chandler Materials, we don’t just offer Velux windows – we’re here to support your entire project. From insulation and timber to bricks, drainage, fixings, and more, we can supply everything you need to get the job done, delivered straight to site.
Working on a tight timeline? Let us know what you need and we’ll source it quickly and efficiently – helping you stay on schedule without compromise

Ready to Let the Light In?
Pop into our Chelmsford branch or give us a call to talk through your requirements – our team is here to help with advice, pricing, and availability & if you need a specific Velux product, just ask – we can source it for you.
At Chandler Material Supplies, we believe community support goes beyond simply supplying materials — it’s about building connections, backing local initiatives, and helping projects that make a real difference. That’s why we’re proud to have recently supported Galleywood Cricket Club with a donation of outdoor paints and wood preservers as part of their continued redevelopment journey.
As part of their springtime spruce-up, the Club reached out with news of exciting changes. With the help of a grant from the Rural Prosperity Fund via Chelmsford City Council, they’ve successfully transformed their bar and bar storage areas. And with even bigger plans in motion — including a major redevelopment application for their Clubhouse submitted to the Football Foundation — it’s an exciting time for the Club and the wider Galleywood community.
This partnership isn’t just about maintaining a clubhouse — it’s about backing an organisation that provides incredible opportunities for people of all ages and backgrounds. Galleywood Cricket Club now proudly runs:
- 12 Youth Teams, including two dedicated Girls’ Teams
- A growing programme for 5-8 year olds, with over 40 young cricketers already signed up
- Dedicated Girls-only training for 8-11 year olds, running alongside mixed training groups
- A thriving Women’s Team, gearing up for their second full league season
- And, impressively, a newly formed Saturday 4th Team, with aspirations of fielding five teams on Saturdays this year!
Their continued growth and commitment to grassroots sport is something we deeply admire. From helping youngsters discover a love for the game to supporting women’s participation in cricket, Galleywood Cricket Club is creating real impact — and we’re proud to be part of their journey.
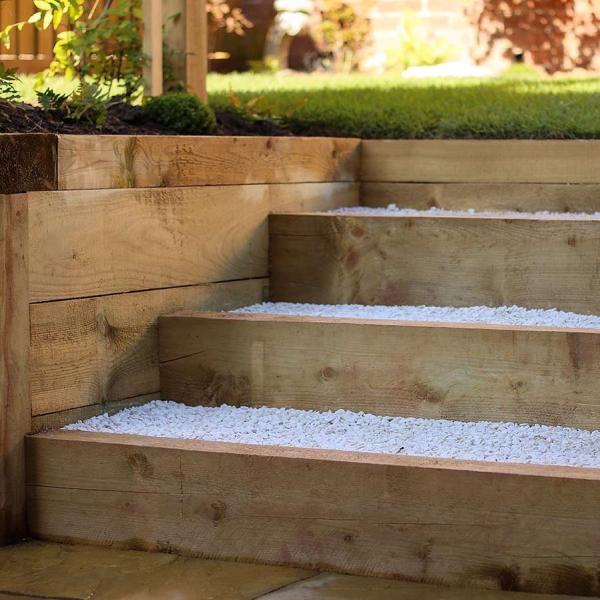
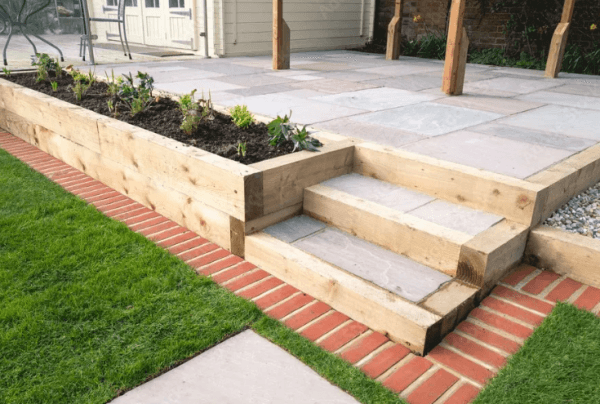
Timber sleepers are an excellent choice for creating garden paths with steps, especially on sloped or uneven ground. They provide a strong, durable, and natural-looking solution that works perfectly in both traditional and contemporary garden designs. Sleeper steps can help improve access around the garden while adding structure and character to outdoor spaces.
Whether you are building a simple pathway through a lawn or creating stepped access on a steep incline, timber sleepers offer a practical and attractive landscaping option.
Why Use Timber Sleepers for Garden Steps?
Timber sleepers are widely used in landscaping because they are sturdy, versatile, and easy to work with. When used for pathways and steps, they help create clear walkways while preventing soil movement on sloping gardens.
Benefits of using timber sleepers for paths and steps include:
✅Strong and durable construction
✅Natural rustic appearance
✅Ideal for sloped gardens
✅Easy to install and maintain
✅Excellent for defining pathways
✅Suitable for gravel, bark, or decorative stone infill
Tools & Materials You May Need
Before starting your project, make sure you have the correct materials and equipment ready.
Materials
- Treated timber sleepers
- MOT Type 1 or hardcore
- Gravel or decorative aggregate
- Timber screws or rebar
- Wooden stakes or support posts
- Weed membrane (optional)
- Tools
- Spade or shovel
- Spirit level
- Tape measure
- Drill and sleeper screws
- Saw (if cutting is required)
- Rubber mallet
- String line
Step 1 – Plan the Path & Steps
Start by planning the route of your pathway and identifying where the steps will be needed. Measure the slope carefully and work out how many steps are required.
Mark the pathway using string lines, spray marker paint, or wooden pegs. Ensure the width of the path is practical for walking comfortably.
A gradual and even step height is important for both safety and appearance.
Step 2 – Prepare the Ground

Remove grass, weeds, loose soil, and debris from the area. Dig out the path and step sections to create a stable base.
For each step, excavate slightly into the slope so the sleeper can sit securely and level.
Compacting the ground before installation will help prevent movement over time.
Step 3 – Install a Solid Sub-Base
Add a layer of MOT Type 1, hardcore, or compacted gravel to the excavated areas. This creates a strong foundation and improves drainage.
Use a spirit level to ensure each step base is level from side to side.
A stable base is essential to prevent the sleepers from shifting once installed.
Step 4 – Position the Timber Sleepers
Lay the timber sleepers horizontally to form the front edge of each step. Check alignment and levels carefully as you work your way up the slope.
The sleepers can be secured using:
- Long sleeper screws
- Steel rebar driven through drilled holes
- Timber stakes positioned behind the sleepers
For larger or steeper projects, additional support posts may be required.
Step 5 – Create the Step Treads
Once the front sleeper for each step is secure, backfill behind it using compacted gravel, decorative stone, or soil depending on the finish you want.
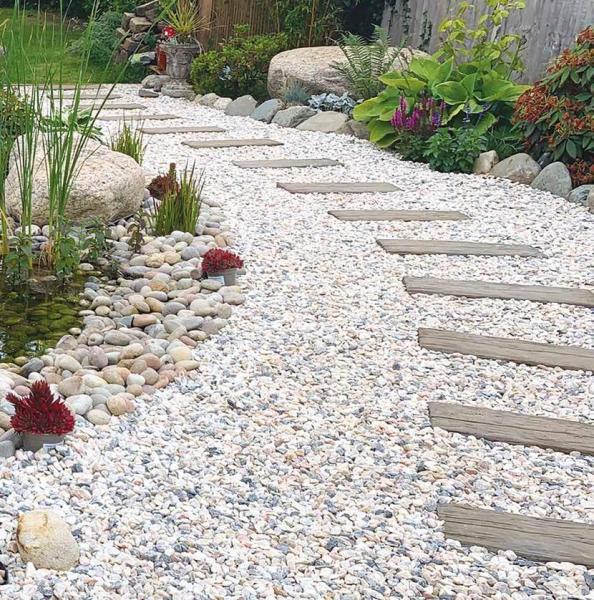
Many garden pathways use:
Gravel
Decorative aggregates
Bark mulch
Paving slabs
Compact stone
Ensure each step tread is firm, level, and drains properly.
Step 6 – Finish the Pathway
Complete the remaining sections of the path between the steps using your chosen surface material.
You may also wish to add:
- Path edging
- Planting borders
- Solar lighting
- Decorative stone features
This helps tie the entire landscaping project together while improving the overall appearance.
Helpful Tips for Sleeper Steps
- Use pressure-treated sleepers suitable for landscaping projects
- Keep step heights consistent for safer walking
- Allow for proper drainage to prevent standing water
- Use galvanised or corrosion-resistant fixings outdoors
- Check levels regularly during installation
- Consider adding a weed membrane beneath gravel pathways
- A Practical & Attractive Garden Solution
Timber sleeper paths with steps are a practical way to improve accessibility in sloped gardens while creating a stylish landscaping feature. Their natural appearance blends beautifully into outdoor environments and works well alongside lawns, patios, planting areas, and decorative aggregates.
With the correct preparation and installation, timber sleeper steps can provide a long-lasting and visually appealing solution for almost any garden project.
Your roof works hard all year round, protecting your home from wind, rain and everything in between. But unless there’s a leak, it’s easy to forget about it. A simple roof inspection can help spot small issues early, before they turn into costly repairs.
From ground level, keep an eye out for cracked or missing tiles, slipped tiles, moss build-up or uneven areas. Inside, damp patches on ceilings or in the loft can also be a sign that your roof needs attention.
The Importance of Quality Roofing Materials
If repairs are needed, choosing reliable materials is key. Marley Roofing offers a wide range of trusted products to suit both traditional and modern homes. Marley Modern tiles are a popular choice, offering a clean, contemporary look alongside long-lasting performance.
It’s also worth thinking ahead. Marley Solar integrates neatly into the roof, providing a smart way to improve energy efficiency without compromising on appearance.
Spotted Damage? Act Quickly
A cracked or missing tile may seem minor, but it can quickly lead to water ingress and further damage. Getting it checked and repaired early can save time, money and hassle.

Need Advice?
If you’re unsure about your roof or need help sourcing the right materials, visit us in-store or give our friendly and experienced team a call. We’re here to help you keep your roof safe and secure.
